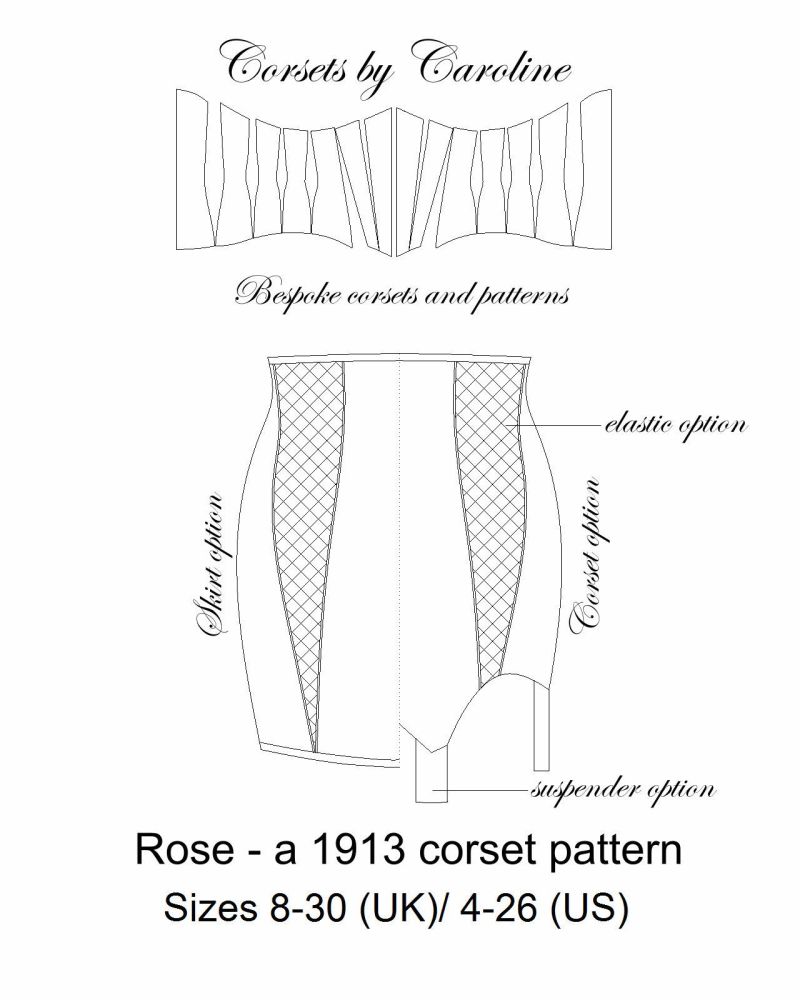
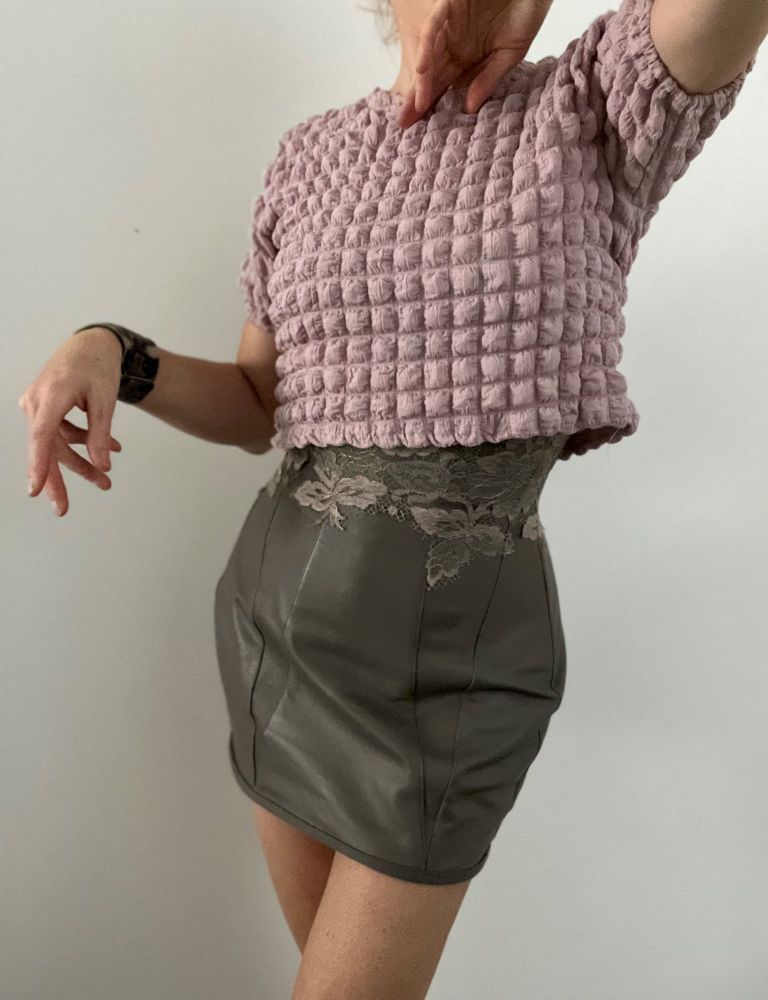
1913-inspired long-line corset or skirt with elasticated option
Posted on
gg
Musings and progress from Caroline - projects she's working on, tips and tricks, and thoughts on corsetry
Posted on
gg


Posted on
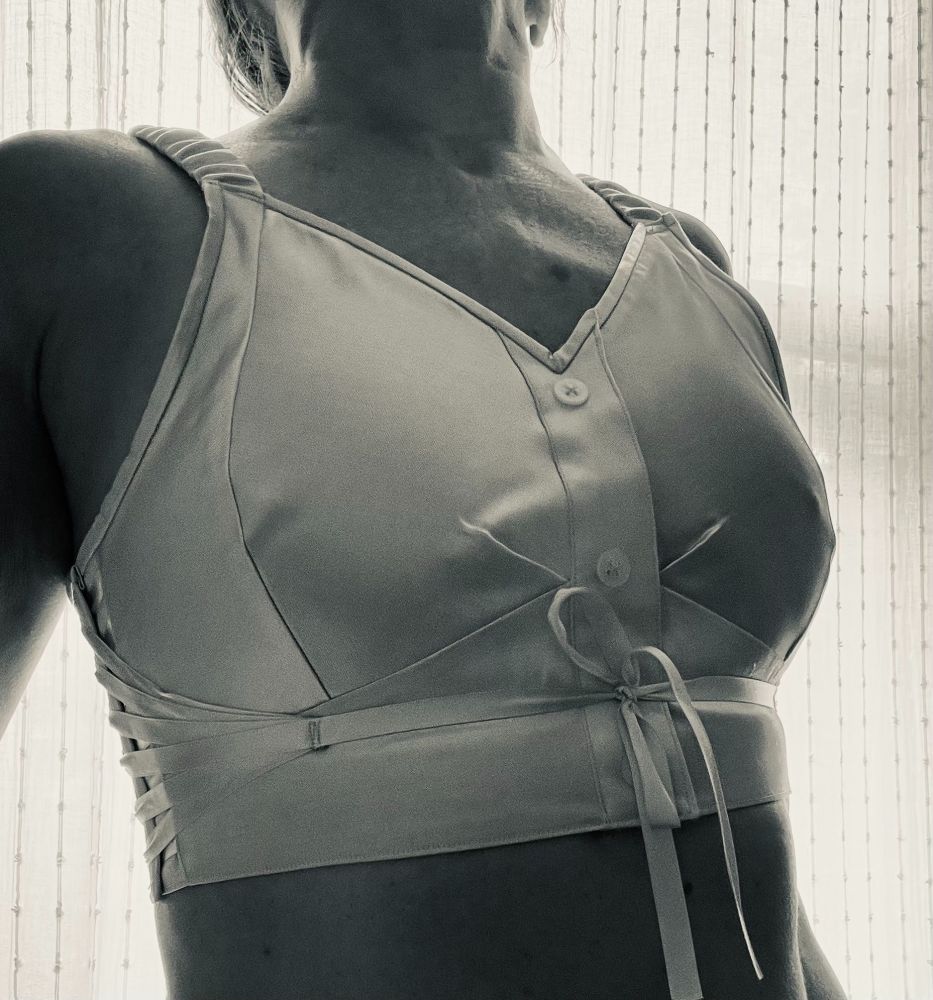
My next Patreon pattern offer is a side (fan) lacing and front fastening (buttons) bra top based on the 1920's side lacing brassieres. Fan-lacing is used at the side to pull the brassiere to size. Note that this is not a supportive bra and if made small in the bust, could be used to flatten the bust in true flapper style! I'm currently designing a larger bust option and will publish on the 23rd September.
Posted on
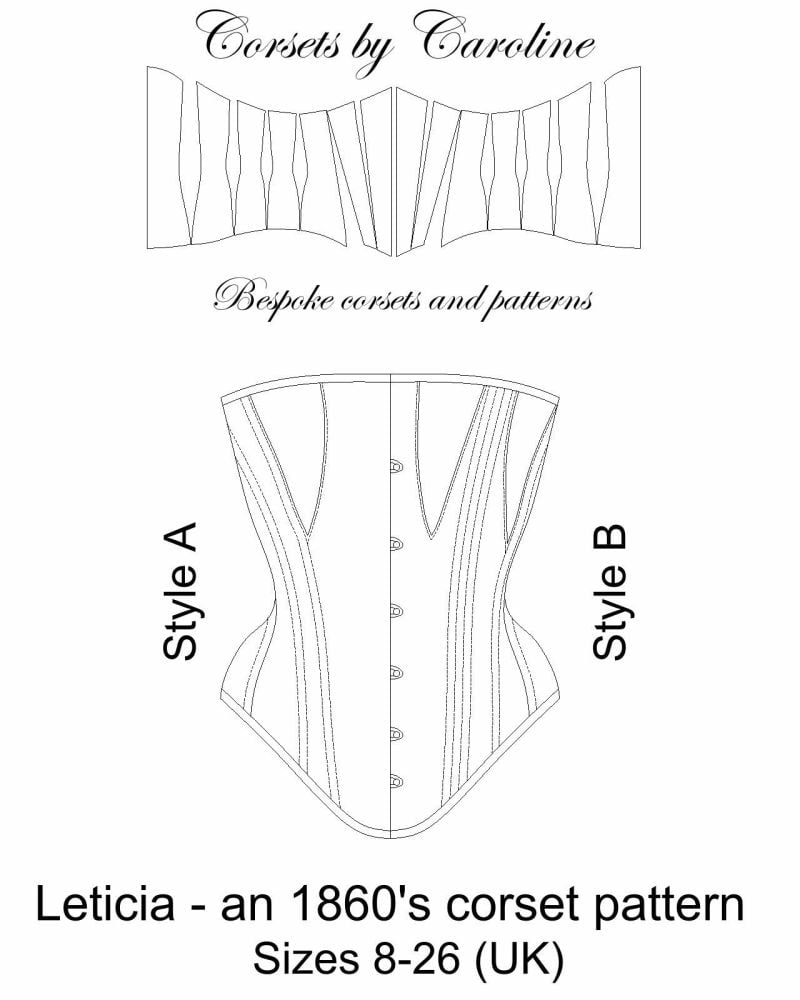
I was in two minds as to whether to design this 1860's corset with one or two gussets, so decided to go with both, and offer makers the option. Small-busted woman can get away with one but for larger busts, two gives more flexibility for adding volume.
When I want to embark on a historical pattern, I start researching the outer fashions as well as photos of corsets from the era, fashion plates, and patented patterns from the time. The corset’s function was dependent on the fashions and its characteristics very much reflected what it needed to do. There was also the issue of the prevailing technology of the time; the widespread use of the slot and stud split busk from the 1850’s, the sewing machine, dyes, weaving techniques, and in the late 1860’s, the copper forms used for steaming corsets into shape.
From the 1850’s skirts grew wider in circumference and petticoats were not sufficiently supportive – hence the crinoline was invented in 1856. It reached its maximum size in the early 1860’s.
There was much satire and amusement in the press of the time;
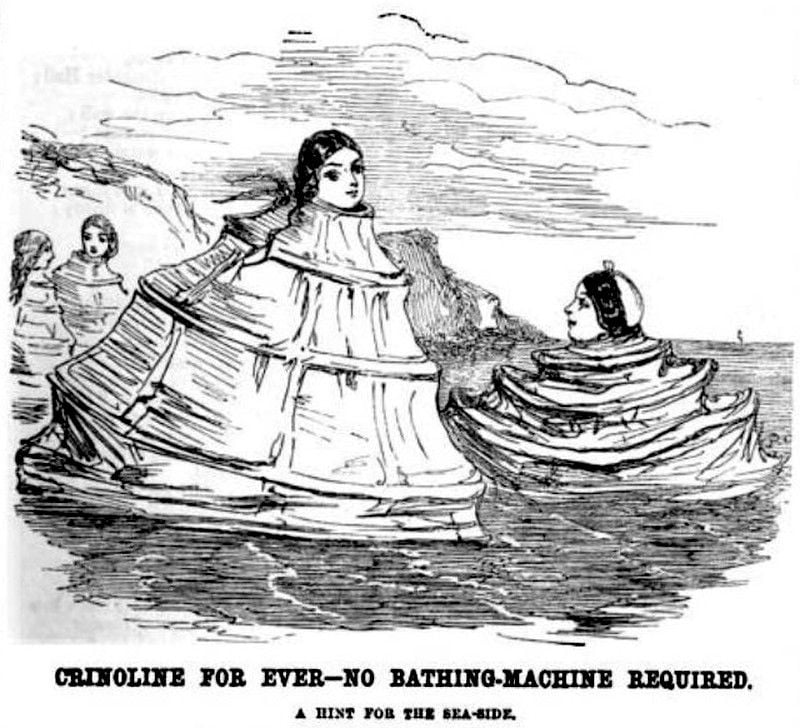
(photo from Punch)
The crinoline was more lightweight than the cumbersome petticoats, and with the expanse of skirts making the waist look small, tight-lacing was not a feature of the early 1860’s; the corsets were quite short and lightweight. The steam moulding (where starched corsets were left to dry on steam-heated copper torso forms) of the late 1860’s produced stiffer, more rounded corsets.
By the mid 1860’s, the large bell-shaped skirts had reached their peak, and the volume began shifting to the rear – the skirts became flatter at the front with a tapered shape that emphasised the back of the body. Cage crinolines adapted to become smaller – the half-crinoline, or crinolette emerged. Crinolettes sometimes featured extra loops of steel at the top to exaggerate the posterior, bridging the gap between the cage crinoline and full bustle of the 1870’s.
From my findings, a mid-1860’s corset had the following features;
- Gussets to provide the bust and hip spring (breasts were allowed to sit in their natural position)
- Split busk at the centre front
- Front panel is cut on the bias
- Short over the hip
- Diagonal boning on the back panel
- Lightweight, often one layer or one layer plus a linen liner
- Eyelets not offset
- Sometimes sparsely boned with the hip area left unboned
- Flossing
Hopefully I have interpreted this era in this design – I left it quite roomy in the under-bust area and found it super comfortable.
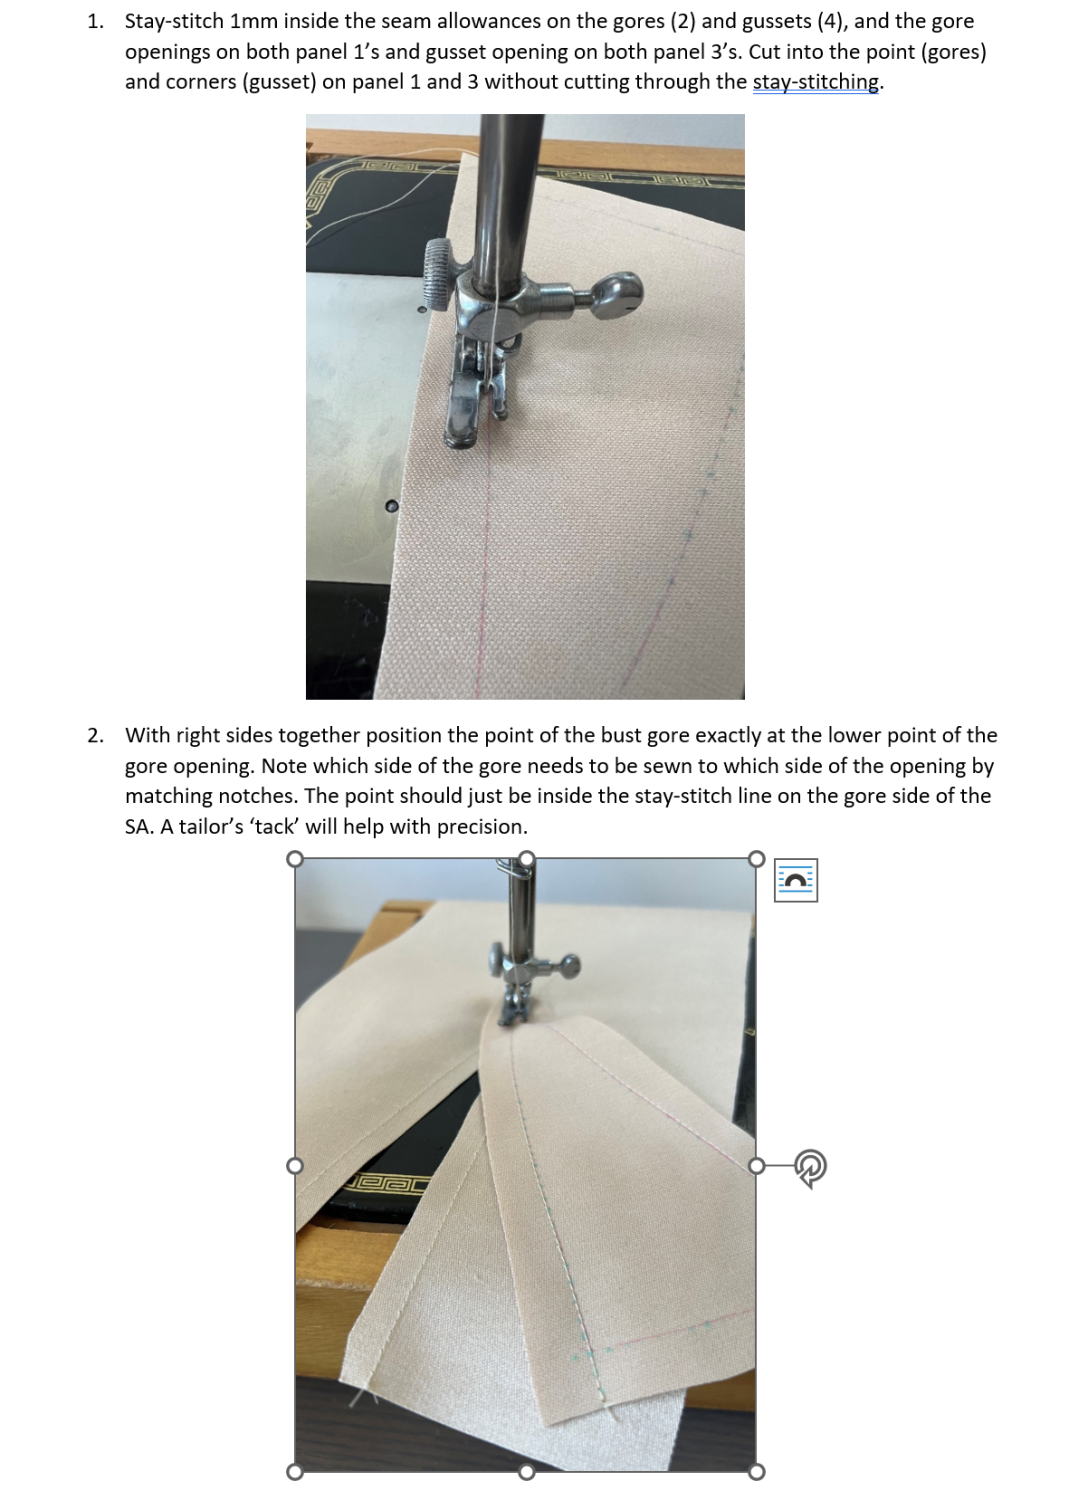
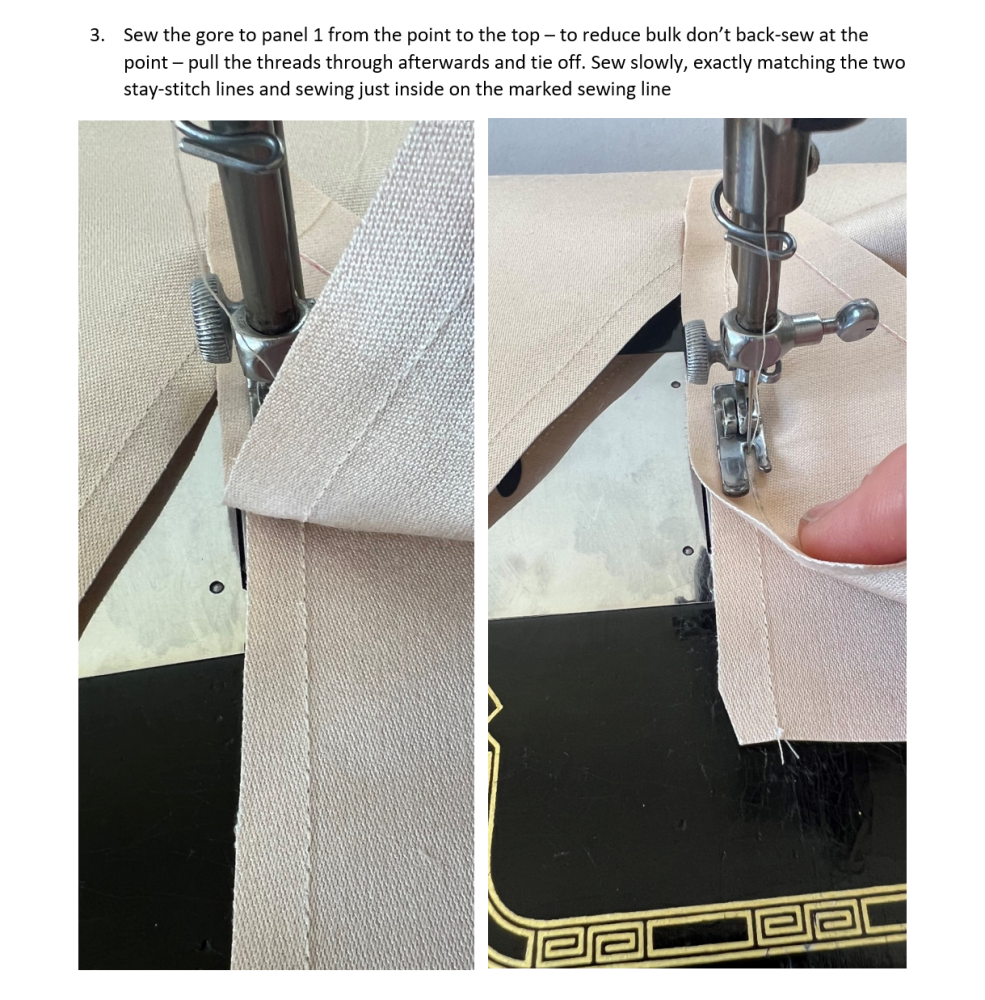
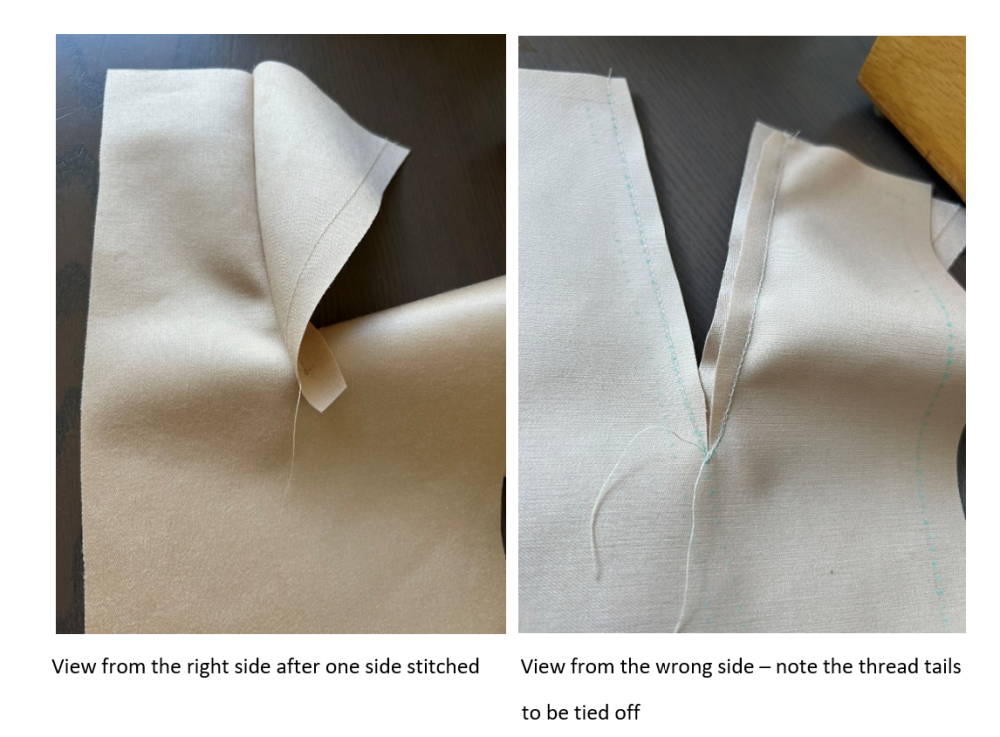
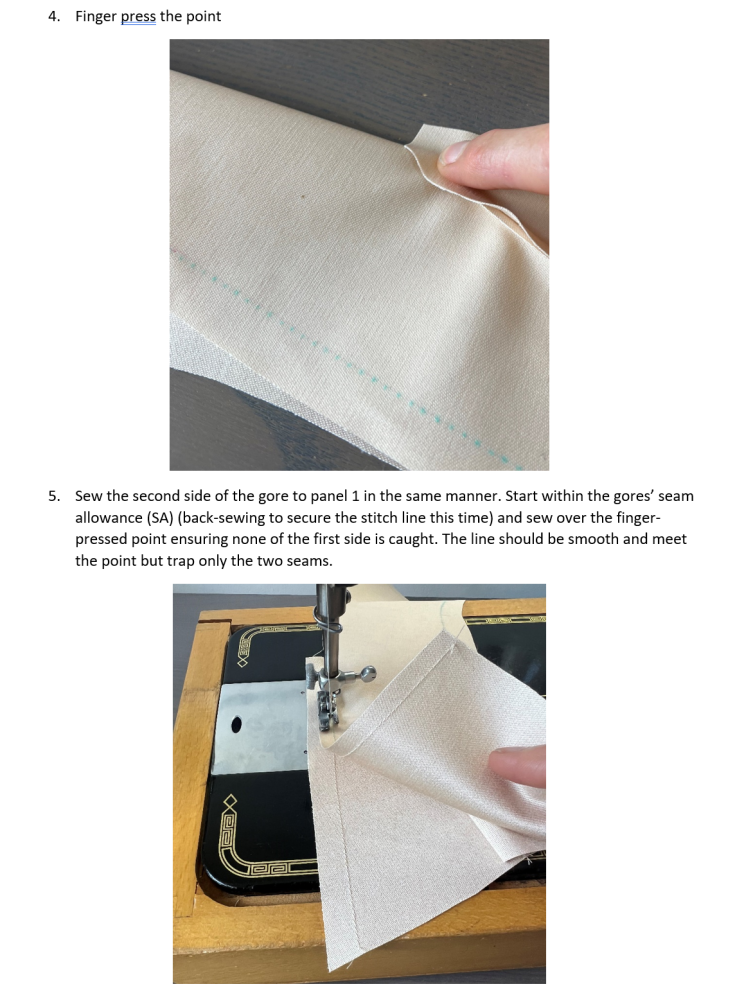
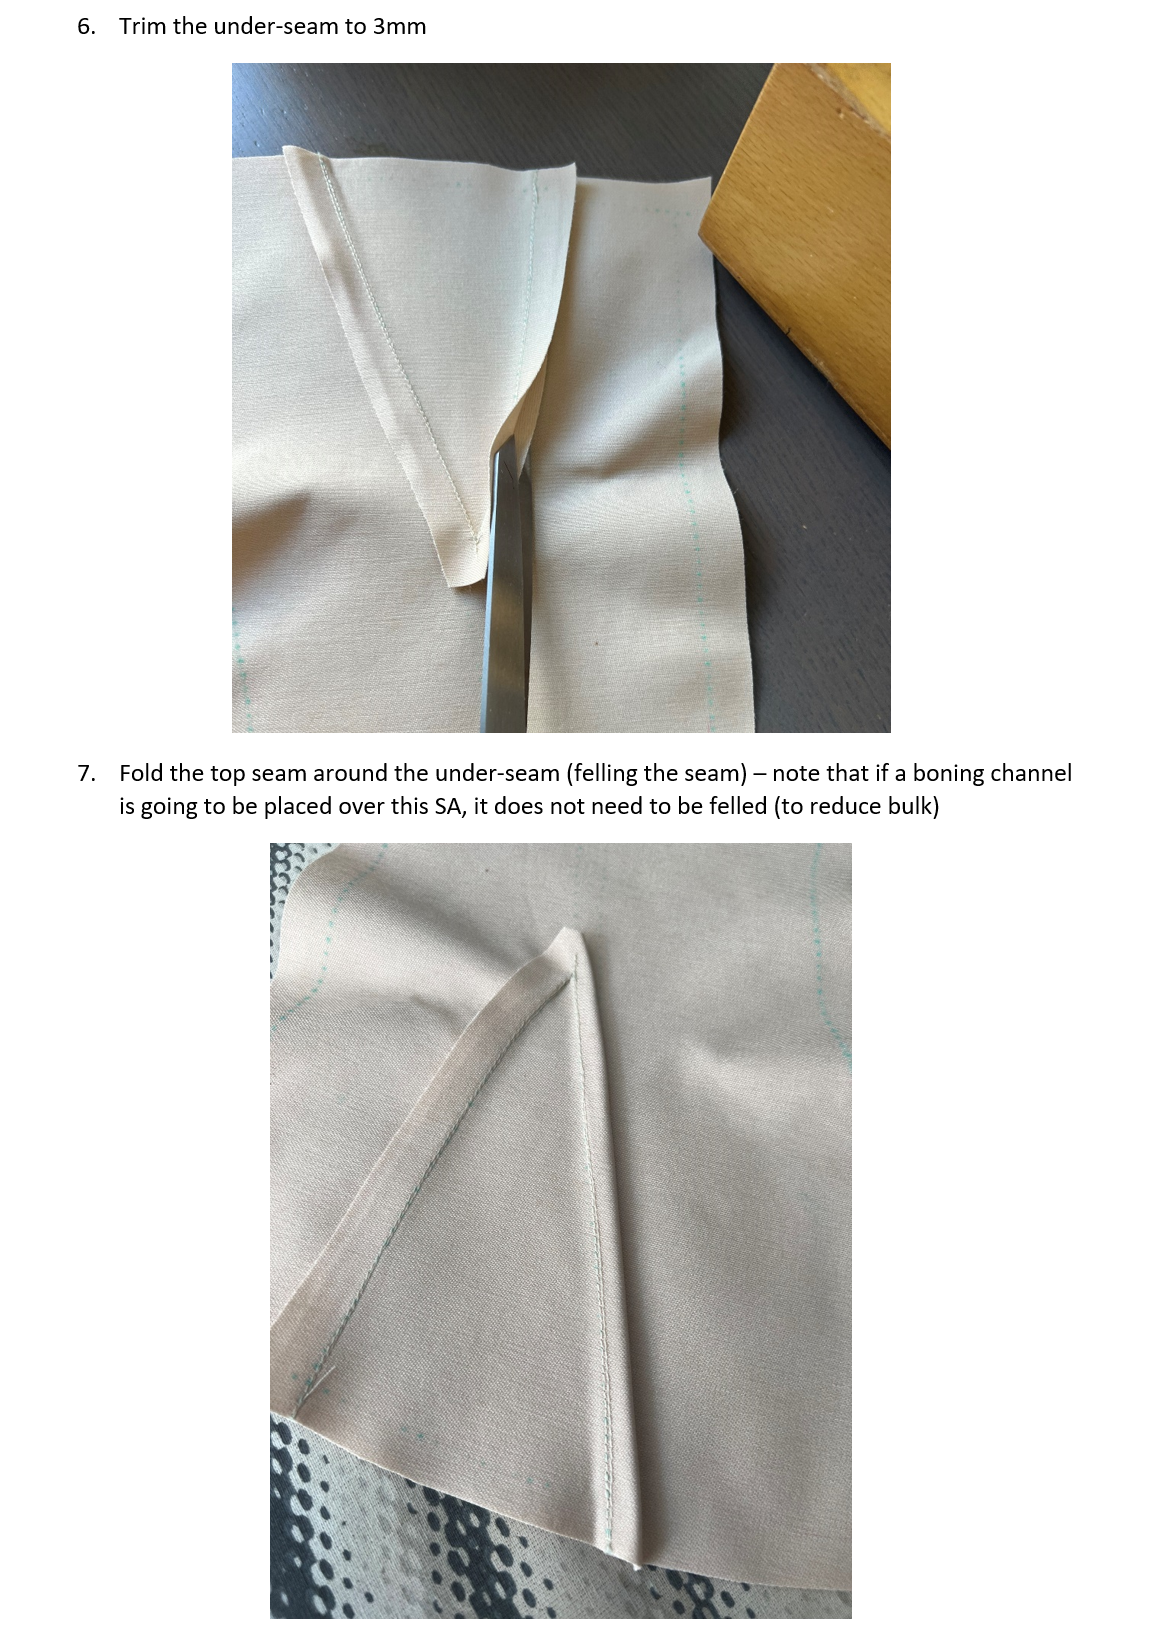
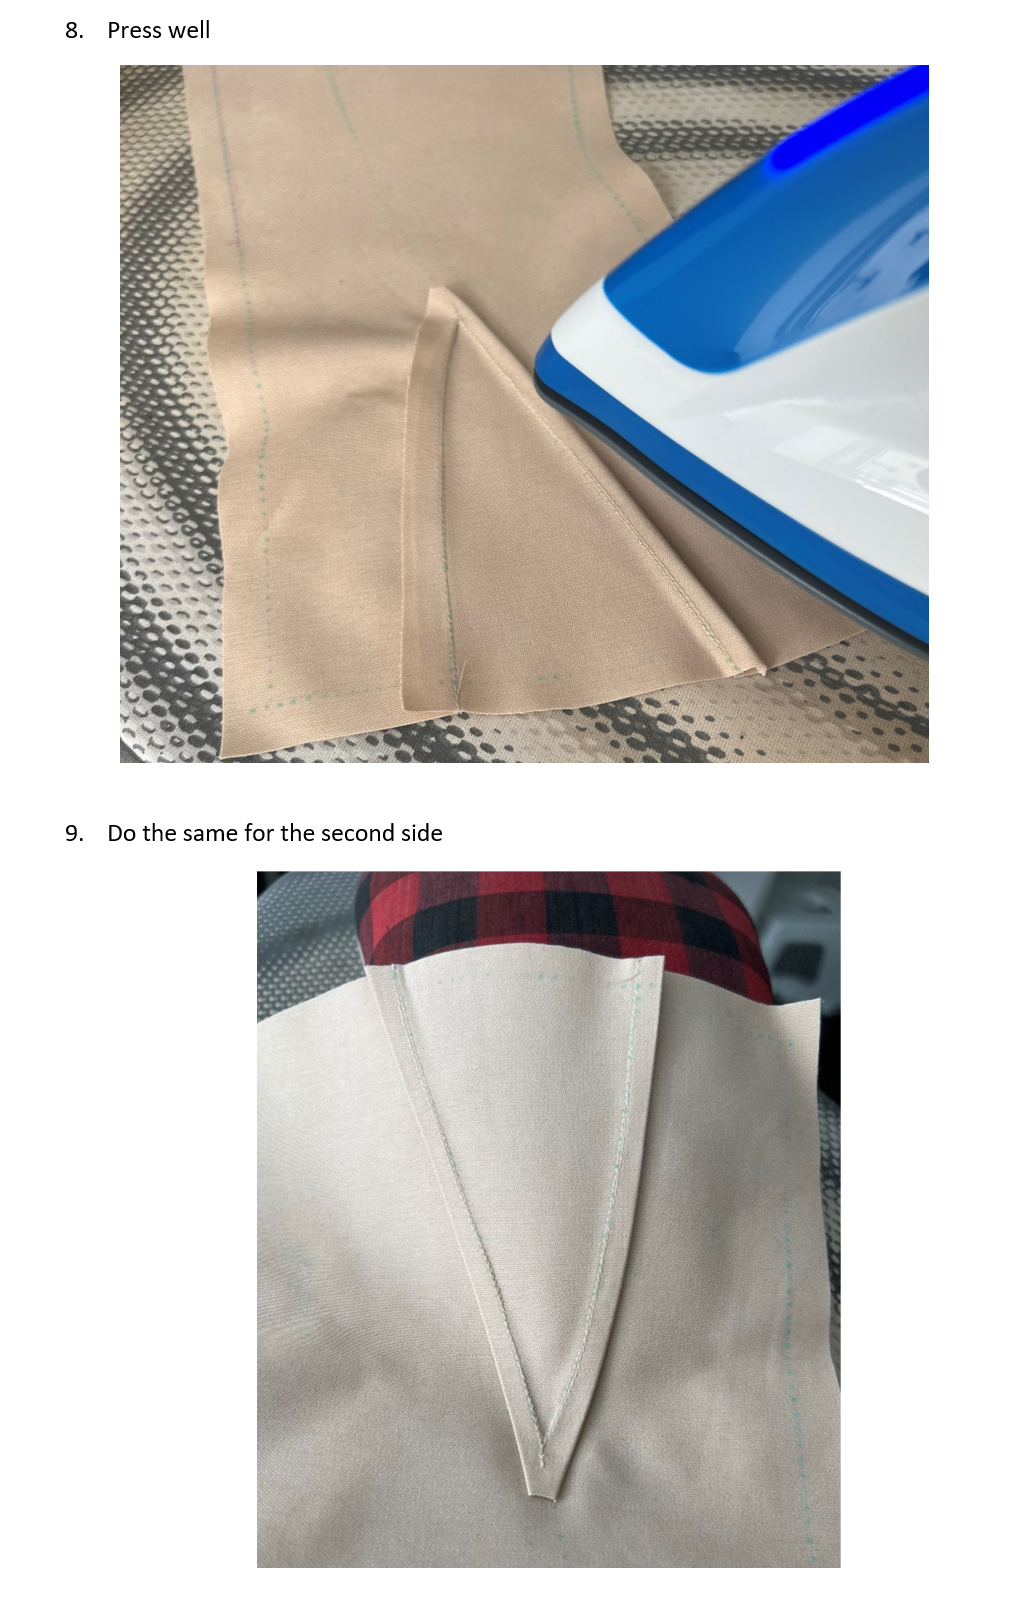
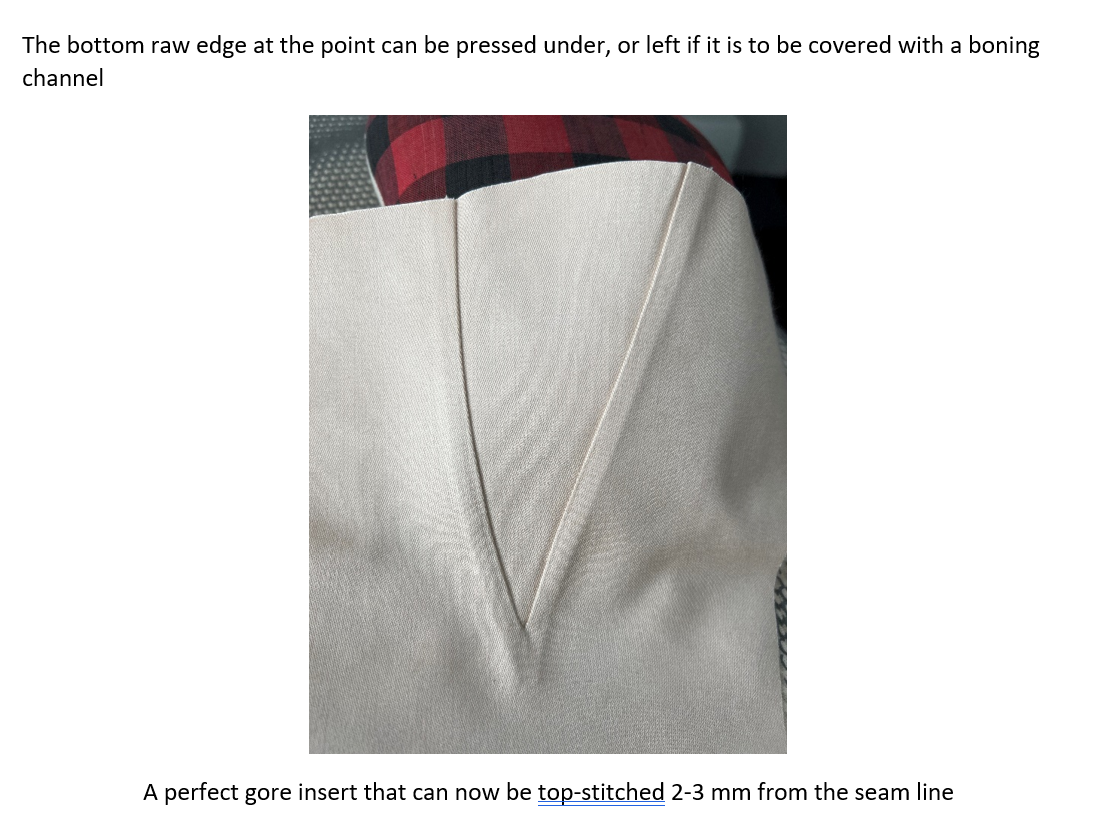
Here's a little tutorial about how to insert gores & gussets - I achieve a lovely point every time and swear by it!
This will be live for Patreon patrons ($3 tier) in August 2022